Start to Finish Flintlocks
A primer for getting back to your 18th century muzzleloader roots.
I grew up watching Fess Parker play Davey Crockett and Daniel Boone on television. Those programs started my life long interest in frontier history, they also made me want to be out in the woods with a flintlock longrifle in the worst way. But I had some growing up to do first. My father was an avid hunter, but he had no interest in those old-fashioned front-stuffers. When it came to guns, my dad was modern all the way.
I couldn’t complain though. My dad outfitted me with modern rifles and shotguns. And I hunted beside him with those guns from the time I was 12 years old. But my desire to emulate the exploits of Boone and Crocket never went away.
So I saved my money, and, at the ripe old age of 18, I drove my beat up Chevy Malibu to the headquarters of Connecticut Valley Arms, which, at the time, was located in Old Saybrooke, Connecticut. I plunked $78 on the counter, and walked out with a CVA Kentucky rifle kit. From that day forward, I’ve never been without at least one flintlock longrifle in the gun rack.
I used that CVA Kentucky throughout my college years. It was a solid rifle that was blessed with an accurate barrel. I won my share of muzzleloading matches with it. Unfortunately, in terms of aesthetics, not to mention historical accuracy, my CVA had about as much in common with the sleek Berks County rifle that Fess Parker carried in his Davey Crockett role as Spam has with a perfectly grilled rib eye steak.
Back in the 1970s there were only a couple commercially available longrifles that were even remotely historically correct, and they were priced out of my reach. So, in 1978 I picked up the Dixie Gunworks catalog and ordered their least expensive, pre-carved stock along with a cheap flintlock, a Douglas .45 caliber barrel, and the various small parts needed to build a flintlock longrifle.
By then I had moved to the city of Philadelphia to start my career where I built that first rifle in a one-bedroom apartment. I didn’t have a workbench…I didn’t even have a vice. Luckily, I was young, and I had a strong grip. For tools I had a power drill, an Xacto knife with an assortment of knife and chisel blades, and a small collection of rasps and files.
Surprisingly, given my lack of both tools and experience, that first build didn’t turn out badly at all. Don’t get me wrong, it would not have won a ribbon at Dixon’s Rifle Makers Fair, but it shot well, and it certainly looked more period correct than anything I could buy off the shelf.
That was 36 years ago, but things really haven’t changed. If you are interested in 18th century military muskets, there are a number of very good, period correct, production models available to choose from. But, if your interests run to the longrifles that would have been carried by frontiersmen during the eighteenth century there are only a couple of production models available. And, to be honest, even they leave a lot to be desired. So, just as in 1978, if you want an authentic flintlock longrifle, your best option is to build your own.
Luckily, today’s rifle builders have it easier than I did back in the dark days of the twentieth century. Today there are far more suppliers of high quality parts than there were then, and, thanks to the internet, those suppliers are easier to find than ever before. There is also more good information available than there was in the past. When I built my first rifle, I used a 25-cent instruction sheet from Dixie Gunworks. Believe me, I got my quarter’s worth, but there was still an awful lot left uncovered. Today there are several excellent how-to books, and there are a number of really excellent rifle maker’s forums on the internet that you can turn to for advice. Many of the best professional rifle builders in the country frequent these boards, and they are generous with their knowledge.
I recently finished my first longrifle build after a 23-year layoff, and I made full use of all the new resources that are available. In the course of doing this build, I think I learned more than I did during the dozen or so rifle builds I did between 1978 and 1990. If you’re thinking of building your own longrifle build, some of what I learned may help smooth the road for you.
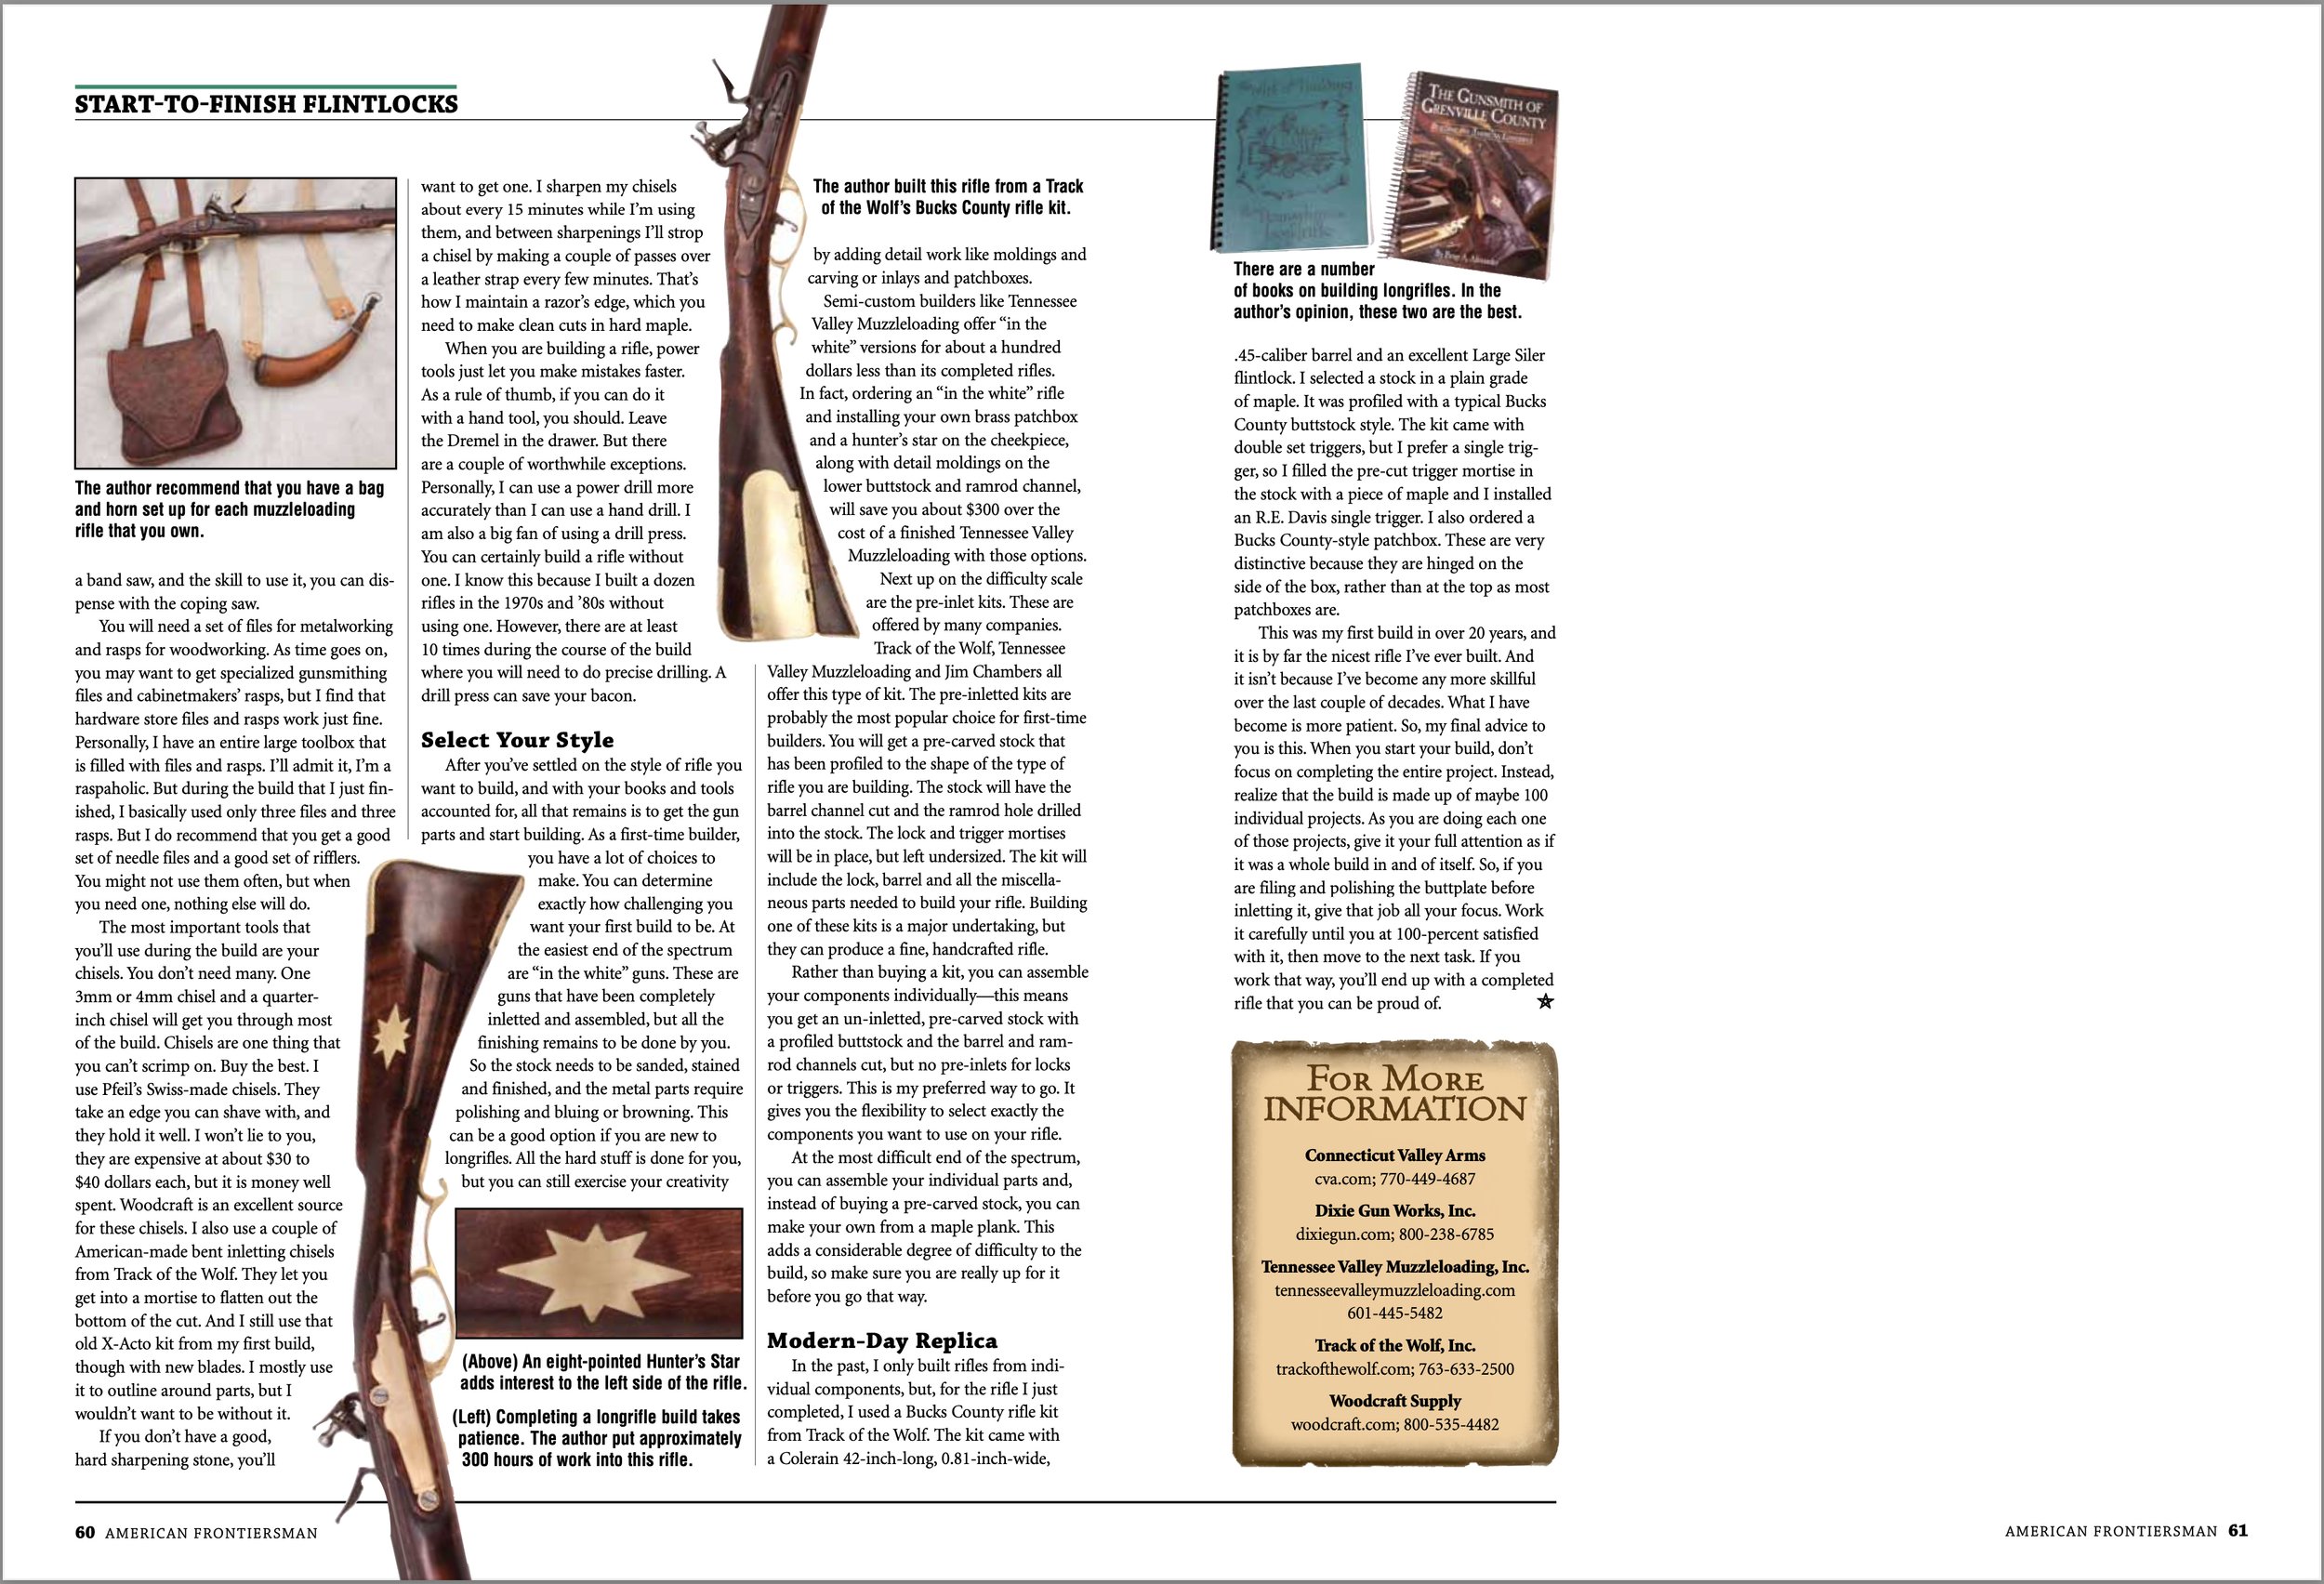
There are a few areas you should address before you start your build. First, you need a good idea of what you want your rifle to look like. There are lots of different styles of longrifles. Just about every county in Pennsylvania had its own unique style of rifle building, and there were rifle makers in Virginia, the Carolinas, and, eventually in points west, like Tennessee. George Shumway’s two volume set, “Rifles of Colonial America” is the bible for familiarizing yourself with longrifle design. It shows a number of “schools” of rifle building, with detailed photographs of several rifles from each school. Unfortunately, this book is out of print. Used versions are easy to find on websites like Amazon.com, but buying one can be pretty pricey. As an alternative, the Kentucky Rifle Foundation sells a series of DVDs featuring a dozen or so rifles on each disc. Each rifle will have a number of high resolution, full color images. These DVDs are reasonably priced, and they are an outstanding resource.
Next you should pick up a good book on building longrifles. In my opinion, the two best are “The Art of Building the Pennsylvania Longrifle” by Dixon, Ehrig and Miller, and “The Gunsmith of Grenville County; Building the American Longrifle” by Peter A. Alexander. I’d recommend that you get both books. They aren’t very expensive, and they compliment each other very well. Read them cover-to-cover before you start, and refer to them often during the build.
The last pre-build area to address is tools. If you love your first build so much that it evolves into a continuing hobby, you’ll find yourself picking up a lot of tools over time, but, for your first build a limited tool kit will get the job done. The good news is that you probably already have a lot of what you need in your shop right now. You’ll need a drill, whether it is hand cranked or powered by electricity really doesn’t matter. You’ll also need a hacksaw and a coping saw. If you have a band saw, and the skill to use it, you can dispense with the coping saw.
You will need a set of files for metalworking and rasps for woodworking. As time goes on you may want to get specialized gunsmithing files and cabinetmakers’ rasps, but I find that hardware store files and rasps work just fine. Personally I have an entire large toolbox that is filled with files and rasps. I’ll admit it, I’m a raspaholic. But during the build that I just finished, I basically used only three files and three rasps. But I do recommend that you get a good set of needle files and a good set of rifflers. You might not use them often, but when you need one, nothing else will do.
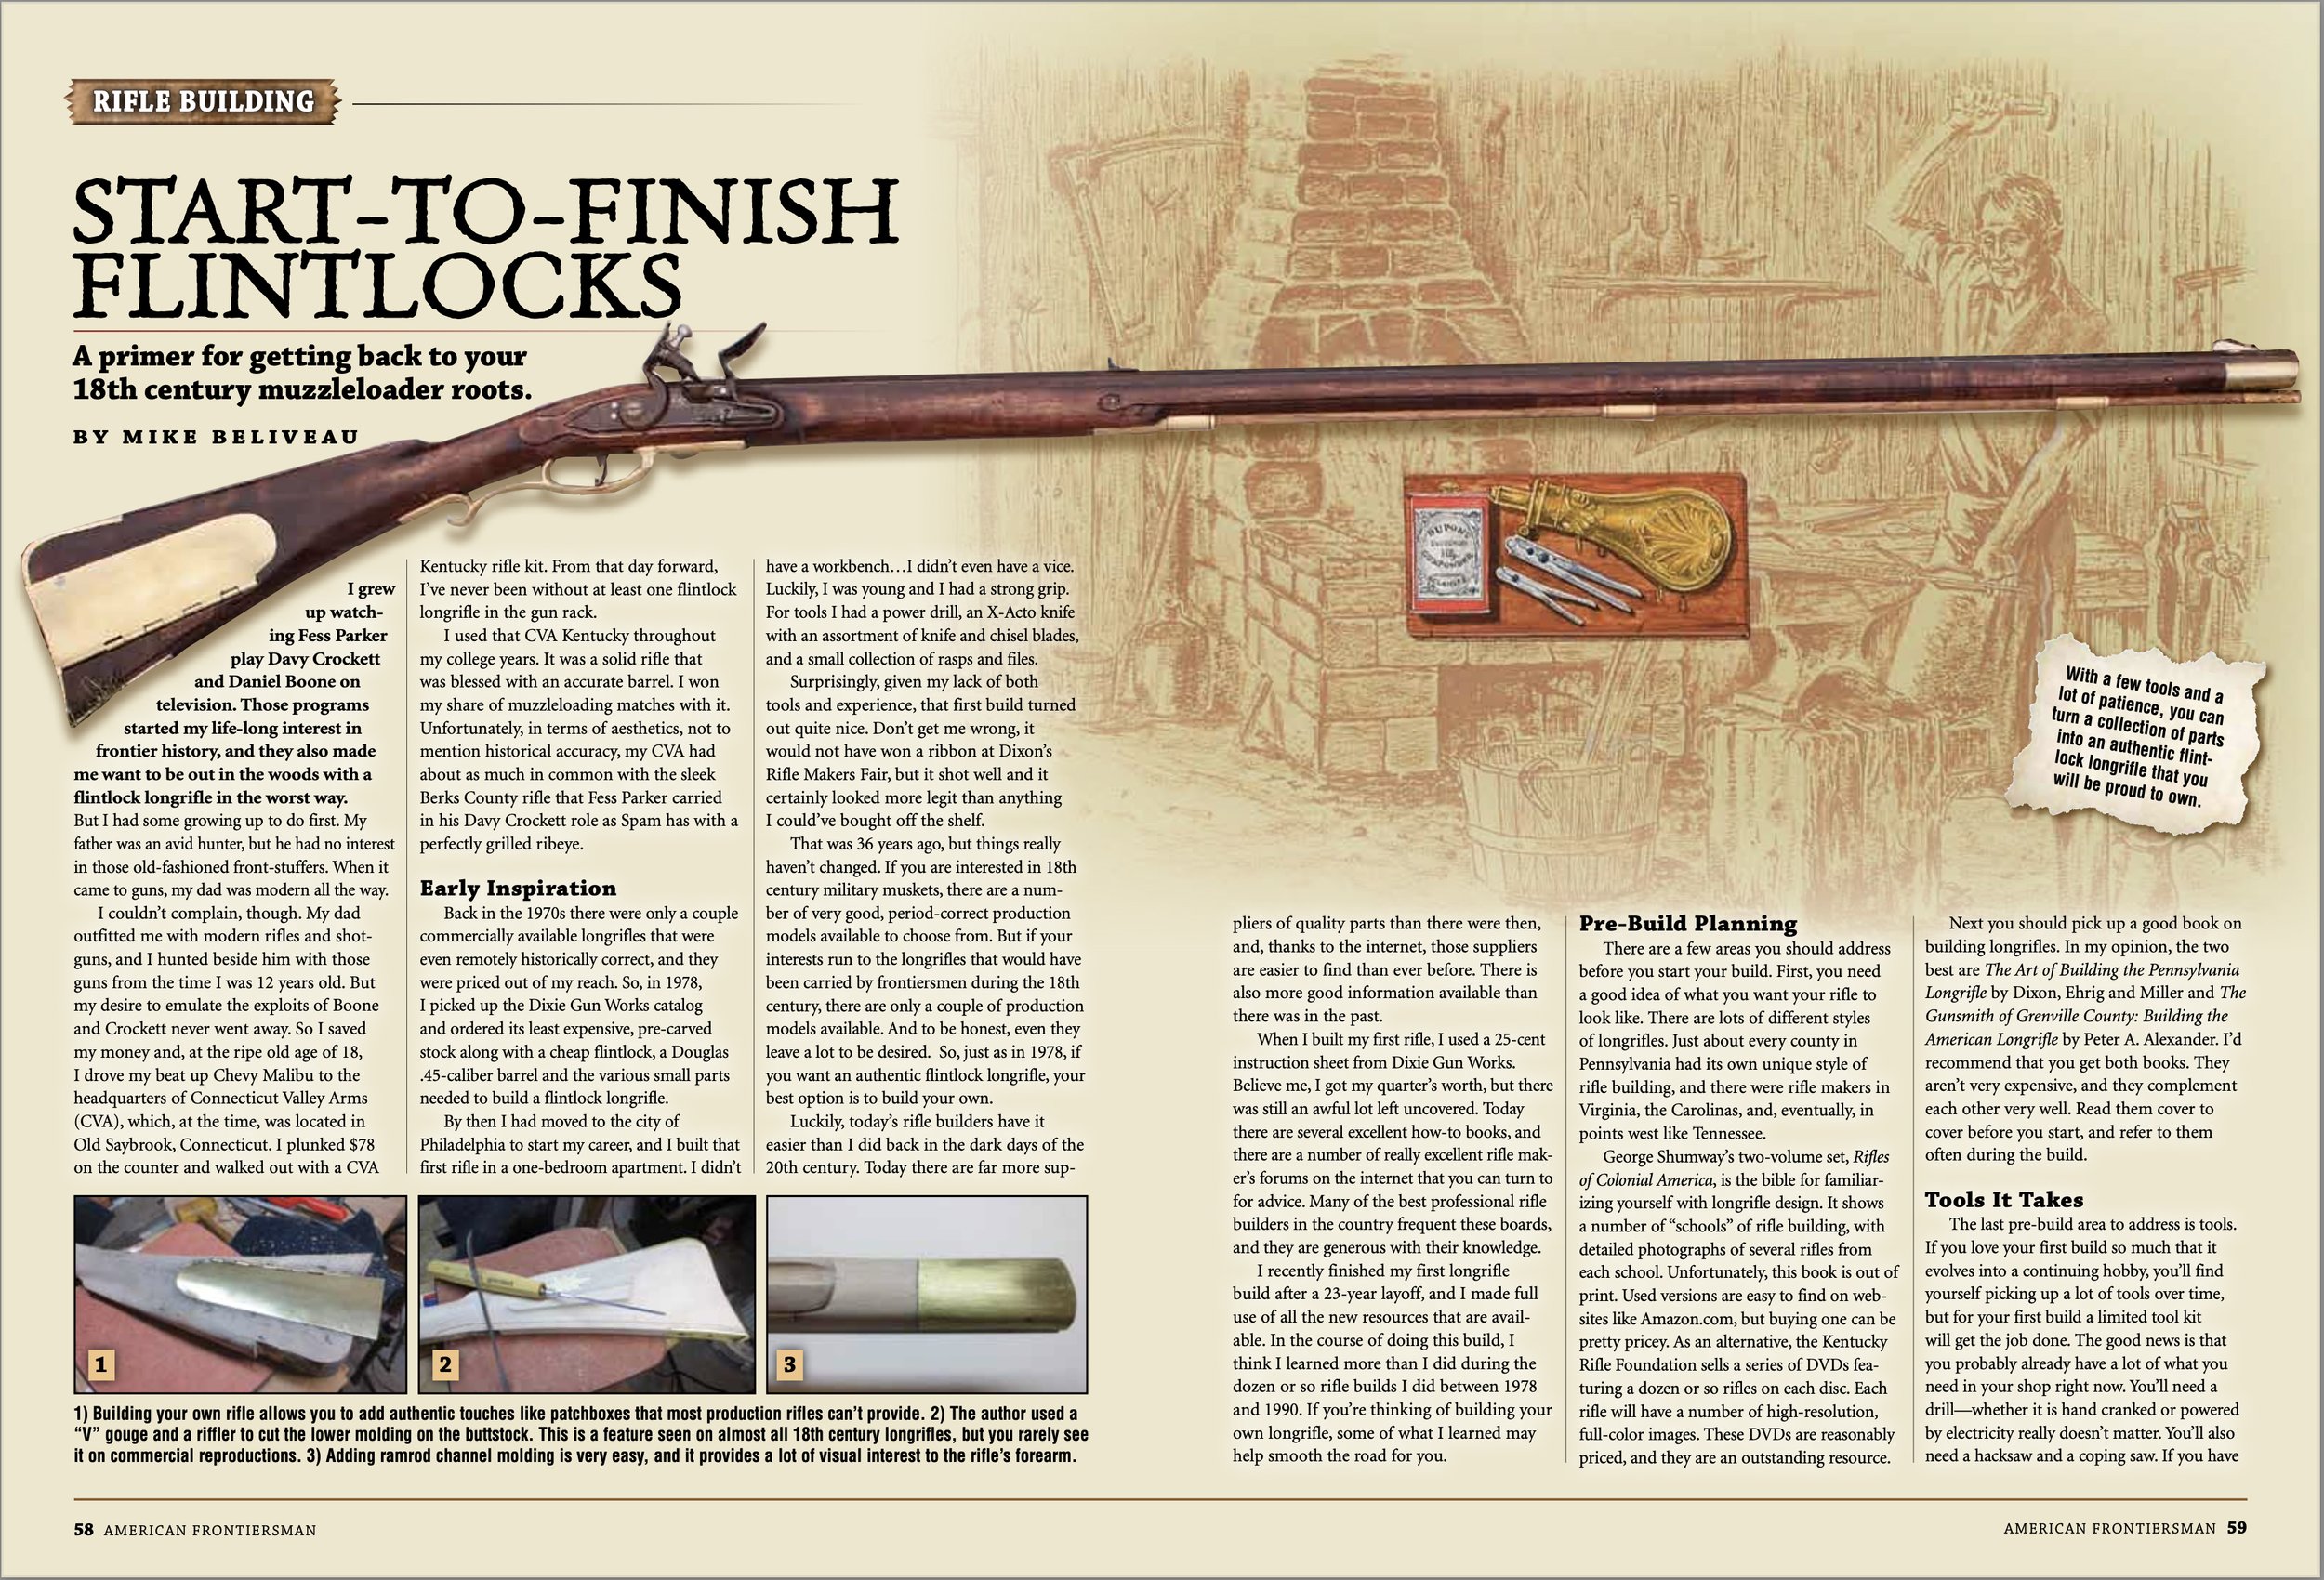
The most important tools that you’ll use during the build are your chisels. You don’t need many. One 3mm or 4mm chisel and a quarter inch chisel will get you through most of the build. Chisels are one thing that you can’t scrimp on. Buy the best. I use pfeil Swiss-made chisels. They take an edge you can shave with, and they hold it well. I won’t lie to you, they are expensive…about thirty to forty dollars each…but it is money well spent. Woodcraft is an excellent source for these chisels. I also use a couple of American made bent inletting chisels from Track of the Wolf. They let you get into a mortise to flatten out the bottom of the cut. And, I still use that old Xacto kit from my first build, though with new blades. Mostly I use it to outline around parts, but I wouldn’t want to be without it.
If you don’t have a good, hard sharpening stone, you’ll want to get one. I sharpen my chisels about every 15 minutes while I’m using them, and between sharpenings, I’ll strop a chisel by making a couple of passes over a leather strap every few minutes. That’s how I maintain a razor edge, which you need to make clean cuts in hard maple.
When you are building a rifle, power tools just let you make mistakes faster. As a rule of thumb, if you can do it with a hand tool, you should. Leave the Dremel in the drawer. But there are a couple of worthwhile exceptions. Personally, I can easier use a power drill more accurately than I can use a hand drill. I am also a big fan of using a drill press. You can certainly build a rifle without one. I know, because I built a dozen rifles in the 1970s and 80s without using one. However, there are at least 10 times during the course of the build where you will need to do precise drilling. A drill press can save your bacon.
After you’ve settled on the style of rifle you want to build, and with your books and tools accounted for, all that remains is to get the gun parts and start building. As a first time builder you have a lot of choices to make. You can determine exactly how challenging you want your first build to be. At the easiest end of the spectrum are “in the white” guns. These are guns that have been completely inletted and assembled, but all the finishing remains to be done by you. So the sock needs to be sanded, stained and finished, and the metal parts require polishing and bluing or browning. This can be a good option if you are new to longrifles. All the hard stuff is done for you, but you can still exercise your creativity by adding detail work like moldings and carving or inlays and patchboxes. Semi-custom builders like Tennessee Valley Muzzleloading offer “in the white” versions for about a hundred dollars less than their completed rifles. In fact, ordering an in the white rifle and installing your own brass patchbox, and a hunter’s star on the cheek piece along with detail moldings on the lower butt stock and ramrod channel will save you about $300 over the cost of a finished TVM with those options.
Next up on the difficulty scale are the pre-inlet kits. These offered by many companies. Track of the Wolf, TVM and Jim Chambers all offer this type of kit. The pre-inletted kits are probably the most popular choice for first time builders. You will get a pre-carved stock, which has been profiled to the shape of the type of rifle you are building. The stock will have the barrel channel cut and the ramrod hole drilled into the stock. The lock and trigger mortices will be in place, but left undersized . The kit will include the lock, barrel, and all the miscellaneous parts needed to build your rifle. Building one of these kits is a major undertaking, but they can produce a fine, handcrafted rifle.
Rather than buying a kit, you can assemble your components individually, and get an un-inletted, pre-carved stock with a profiled butt stock and the barrel and ramrod channels cut, but no pre-inlets for locks or triggers. This is my preferred way to go. It gives you the flexibility to select exactly the components you want to use on your rifle.
At the most difficult end of the spectrum, you can assemble your individual parts, and, and, instead of buying a pre-carved stock, you can make your own from a maple plank. This adds a considerable degree of difficulty to the build, so make sure you are really up for it before you go that way.
In the past I only built rifles from individual components, but, for the rifle I just completed, I used a Bucks County rifle kit from Track of the Wolf. The kit came with a Colerain, 42-inch long, 13/16th of an inch wide .45 caliber barrel, and an excellent Large Siler flintlock. I selected a stock in a plain grade of maple. It was profiled with a typical Bucks County butt stock style. The kit came with double set triggers, but I prefer a single trigger. So I filled the pre-cut trigger mortise in the stock with a piece of maple, and I installed an R.E. Davis single trigger. I also ordered a Bucks County style patchbox. These are very distinctive because they are hinged on the side of the box, rather than at the top, as most patchboxes are.
This was my first build in over 20 years, and it is by far the nicest rifle I’ve ever built. And it isn’t because I’ve become any more skillful over the last couple of decades. What I have become is more patient. So, my final advice to you is this. When you start your build, don’t focus on completing the entire project. Instead, realize that the build is made up of maybe 100 individual projects. As you are doing each one of those projects, give it your full attention, as if it was a whole build in and of itself. So, if you are filing and polishing the butt plate before inletting it. Give that job all your focus. Work it carefully until you at 100 percent satisfied with it, then move to the next task. If you work that way, you’ll end up with a completed rifle that you can be proud of.
Points of contact:
Track of the Wolf, Inc.
18308 Joplin St NW
Elk River, MN 55330-1773
763-633-2500
http://www.trackofthewolf.com/
Tennessee Valley Muzzleloading, Inc.
#1 Assembly Street
Natchez,Mississippi 39120
601-445-5482
Woodcraft Supply, LLC
P.O. Box 1686
Parkersburg, WV 26102-1686
800-225-1153